The woollypetals collection
Quilt and craft patterns that spark joy
Hand-crafted, easy to follow instructions available as instant PDF downloads.
Patterns for Every Kind of Maker
Quilts, pillows, stuffed animals, paper pieced blocks, and more!
 NEW
NEWStuffed Animals
Coco the Crab
$6.00Skill Level: Advanced Beginner
 NEW
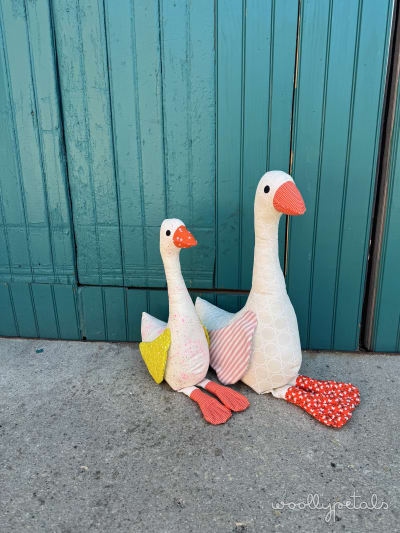
NEWStuffed Animals
Silly Goose
$6.00Skill Level: Beginner
 NEW
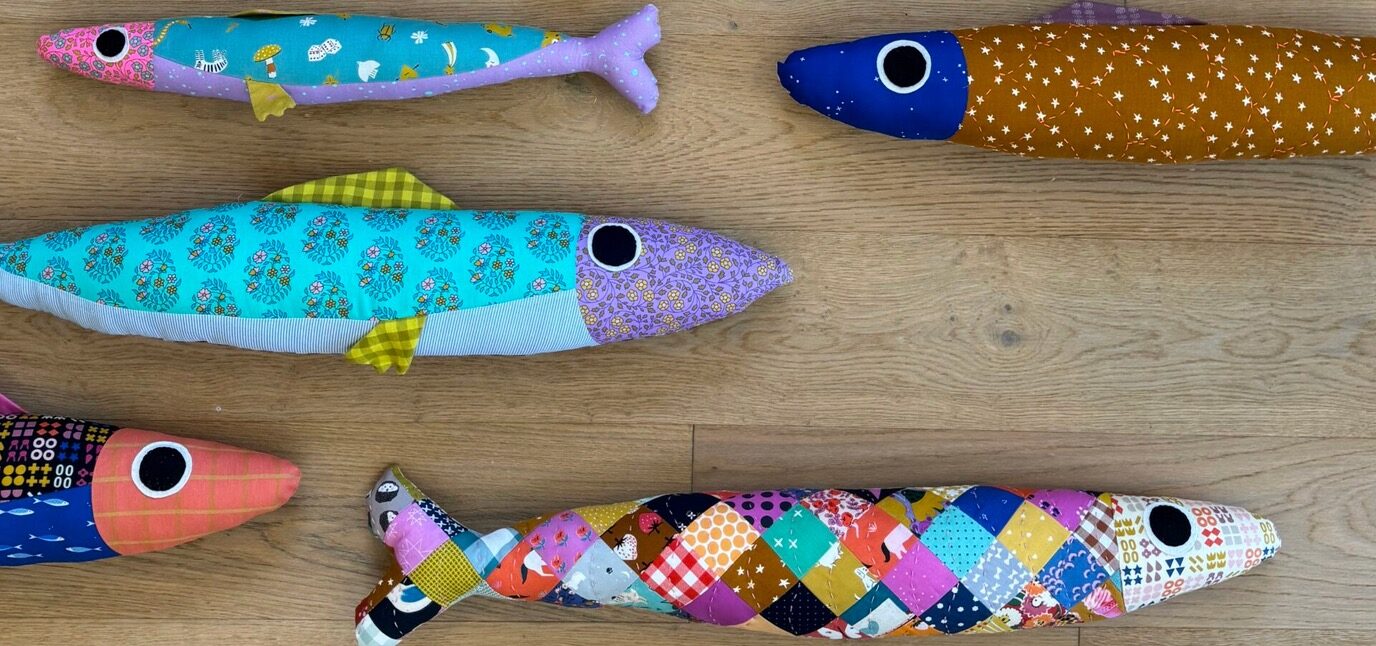
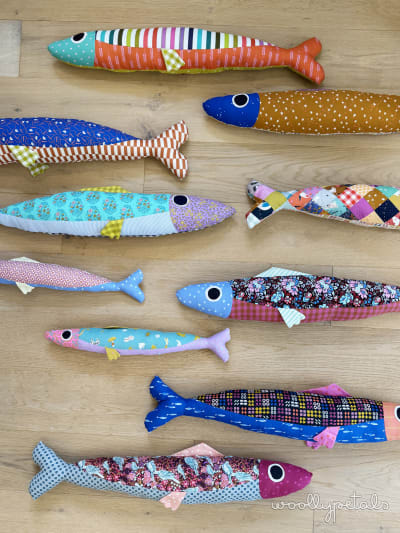
NEWStuffed Animals
Sardine Pillow
$6.00Skill Level: Advanced Beginner
 NEW
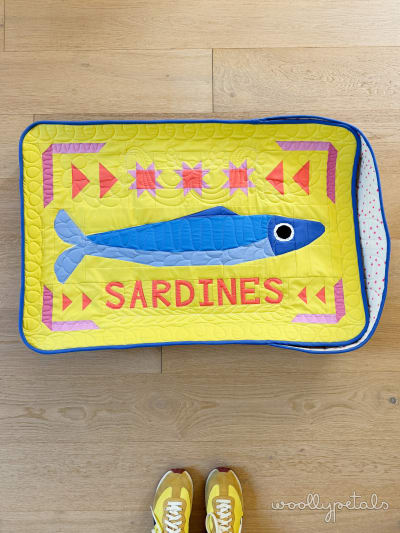
NEWQuilts
Sardine Tin FPP
$18.00Skill Level: Intermediate
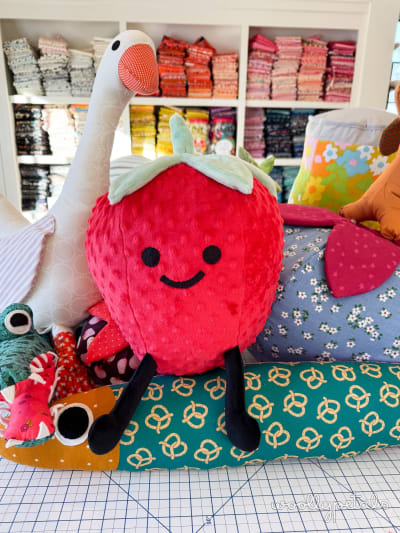 NEW
NEWStuffed Animals
Strawberry Pillow
$6.00Skill Level: Advanced Beginner
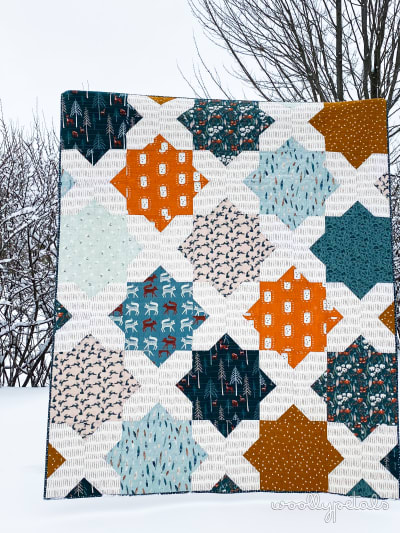
Quilts
Floored Quilt
$12.00Skill Level: Advanced Beginner
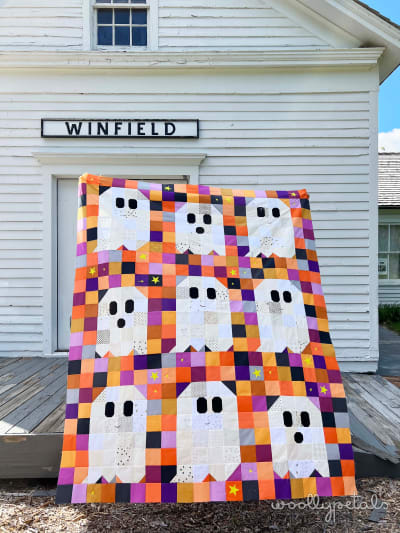
Quilts
Ghost Party Quilt
$12.00Skill Level: Advanced Beginner

Pouches
Cat Pouch
$6.00Skill Level: Intermediate
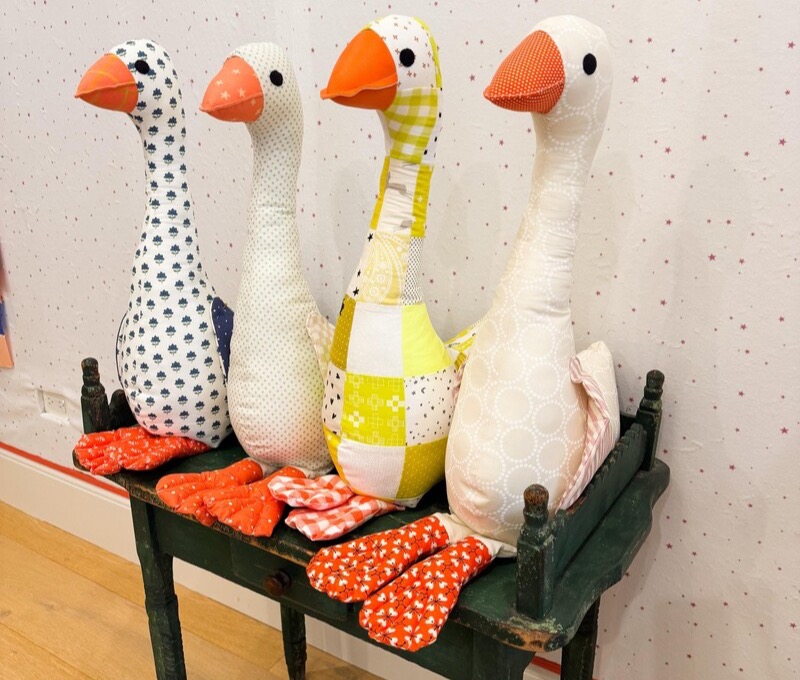
Featured pattern
Meet the Silly Goose
A 20" or 16" stuffed animal goose that's way too fun to make just one of. Clear instructions, a companion video, and multiple mods like patchwork, vinyl beaks, even a flamingo version if you extend the legs.
Fair warning: I currently have 12 in my sewing room and I'm not done yet.

The maker behind the patterns
Hi, I'm Kristin
I've been making since I was young and jumped into quilting over 10 years ago. I love all things crafty, cute, and vintage, and I try to bring a little bit of that into every pattern I design.
more about me →From the Blog
Tutorials, Sew-A-Longs, and whatever I'm making lately.

April 2026
Coco the Crab Pattern Release
The Coco the Crab Pattern is here!
Welcome Coco the Crab and included baby crab sewing pattern to the woollypetals family. This is another fun sewing pattern that will help you create an adorable crab stuffed animal.

February 2026
Chat and Craft Episode 6!
In the Chat and Craft Episode 6 I talk about what I am working on lately. New patterns coming, some patterns I have tried by others, and a little about...

February 2026
Pasta Pillow Tutorial
Hi Friends! Have you been searching for a Pasta Pillow Tutorial? Well I have just the one for you. ;) A full step by step video tutorial on YouTube sharing...
✂️ newsletter
Never Miss a Pattern Drop
New patterns, tutorials, and sew-a-long announcements delivered to your inbox.