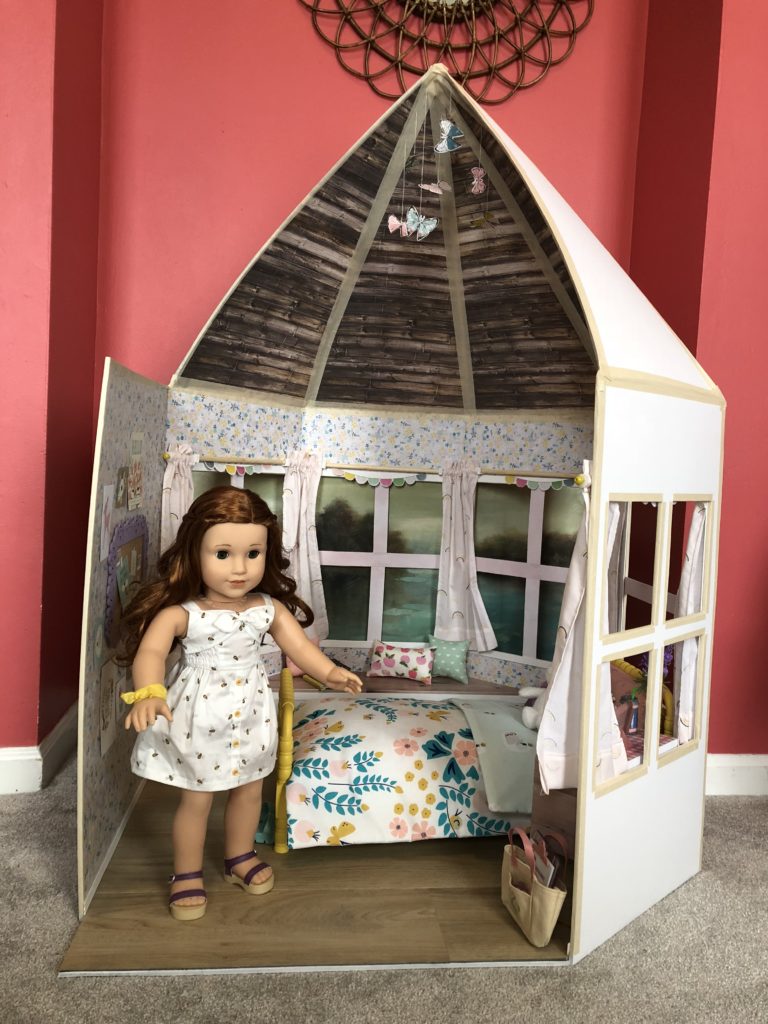
Blaire Wilson is the New American Girl of the Year for 2019. I took my kids into the city of Chicago on January 1st to check her out and ended up letting my daughter bring her home. Whoops. Who am I kidding we were never not going to leave with her, sorry honey. Anyway she is adorable and my daughter LOVES her to pieces.
Once Blaire joined my daughters AG family consisting of Nanea, Luciana, and Camille, we got to work reading her book right away and really enjoyed her story, along with getting a bigger picture of where she lives. Blaire’s book tells us her bedroom is on the third story of her families Victorian Bed & Breakfast in the Turret. So naturally my mind went to how can we recreate her room. Being an Interior Designer by trade has me always planning rooms and to get to make one in the scale to fit Blaire sounded like great fun.
My daughter has an American Girl “Dollhouse” consisting of two 16″ deep x roughly 50″ wide shelves in her closet. I’ll pop a little picture below to see it. It’s pretty full, with 3 dolls already residing there I knew Blaire’s room would have to be elsewhere, along with it being Turret shaped. We plan on making a big dollhouse this spring and I may try and figure out how to incorporate Blaire’s room room in that design.
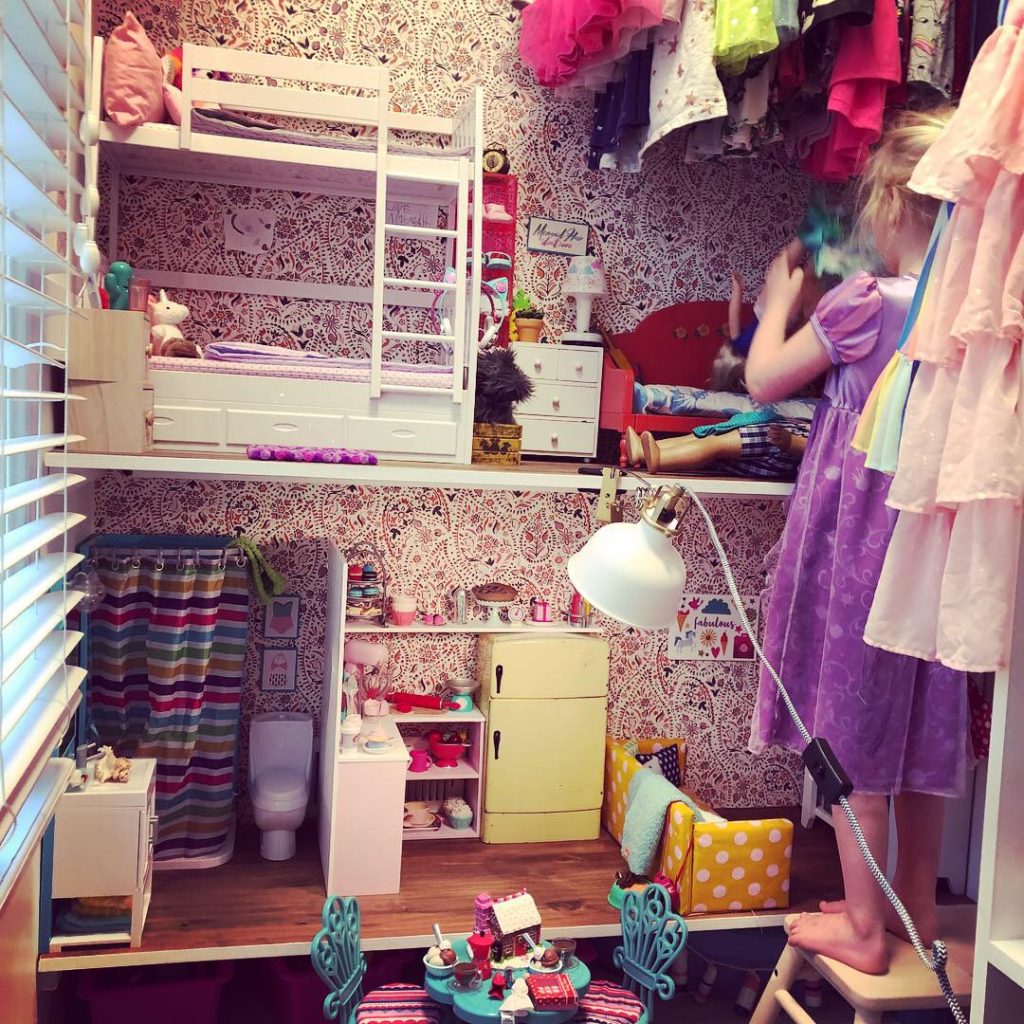
(The light was there purely for pictures) We had just finished making a little kitchen area to fit all the kitchen supplies she got for Christmas.
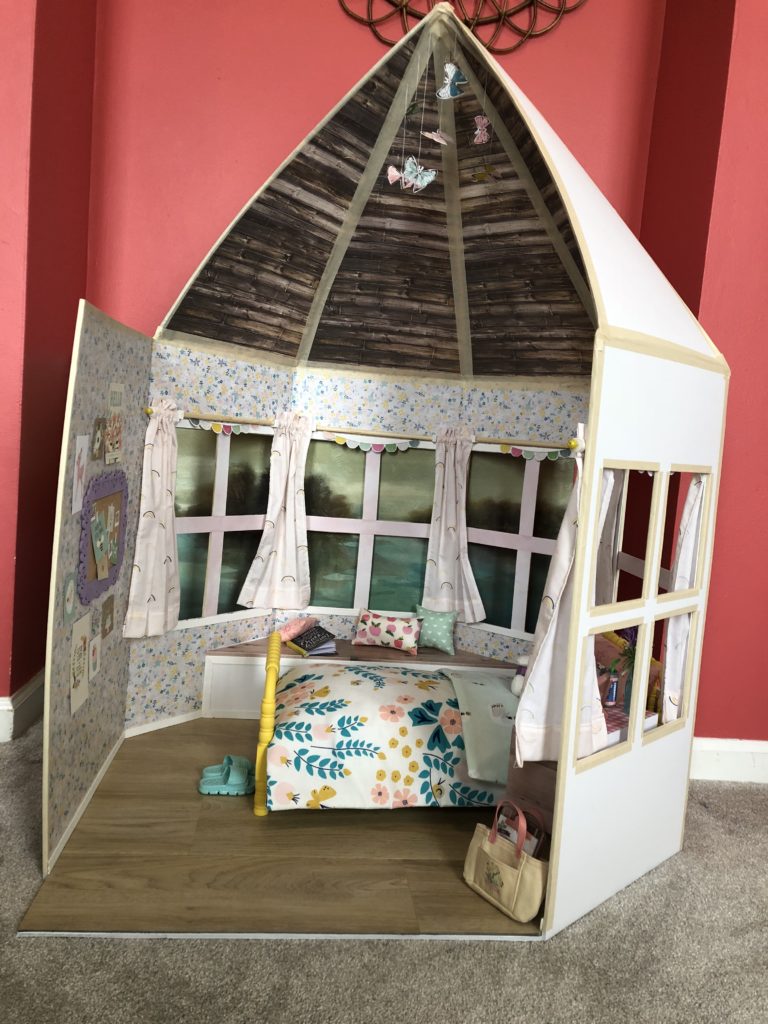
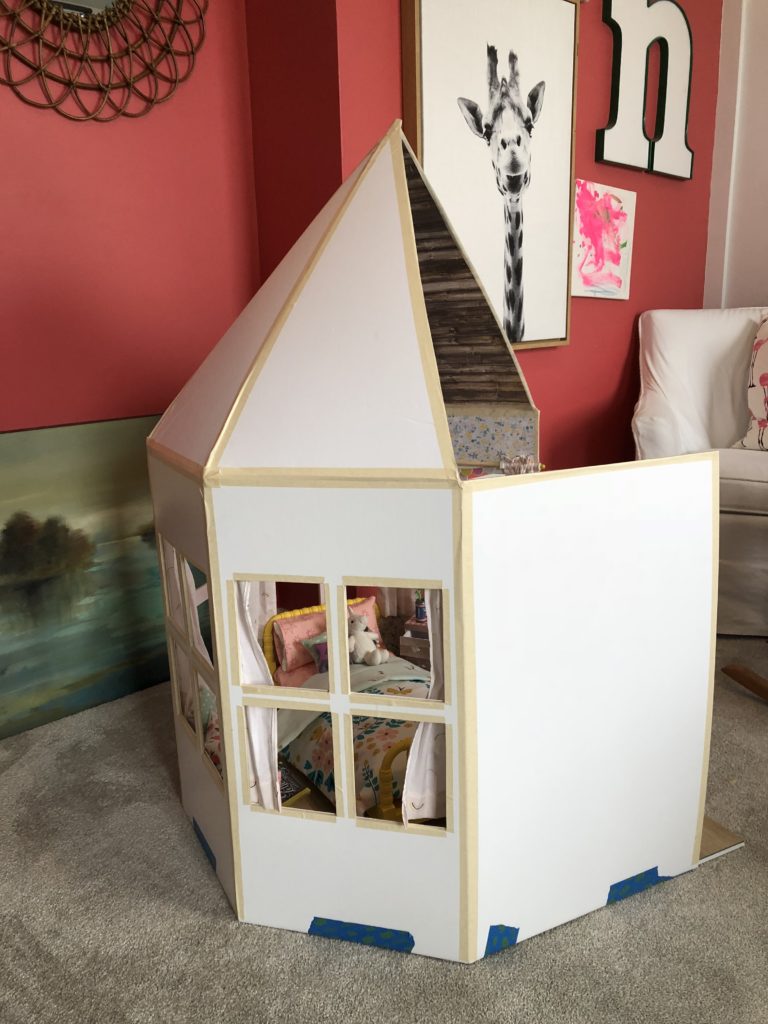
I constructed the room base from Foam Core. Using 3/8″ thick for the walls and ceiling and 1/2″ thick for the floor. I planned out of graph paper the room plan after looking at a ton of turret floor plans. The one I model it closest to had a closet in the open space and the door in the corner. Once the plan was set I cut the walls out, I had to do a little bit of fancy cutting to get the angles on the edges. After cutting the walls to size and making sure they worked in the layout I had come up with I cut out all the windows and then constructed the room. I used painters tape to hold the walls in place on the outside while the glue set and then replaced the painters tape with masking tape. We will be “siding” and “shingling” the exterior with paper strips at some point so it will all be covered. You can see the outside in the picture above. The picture below is an in progress picture of which I took few. I seemed to take more videos in my Instagram stories more than anything.
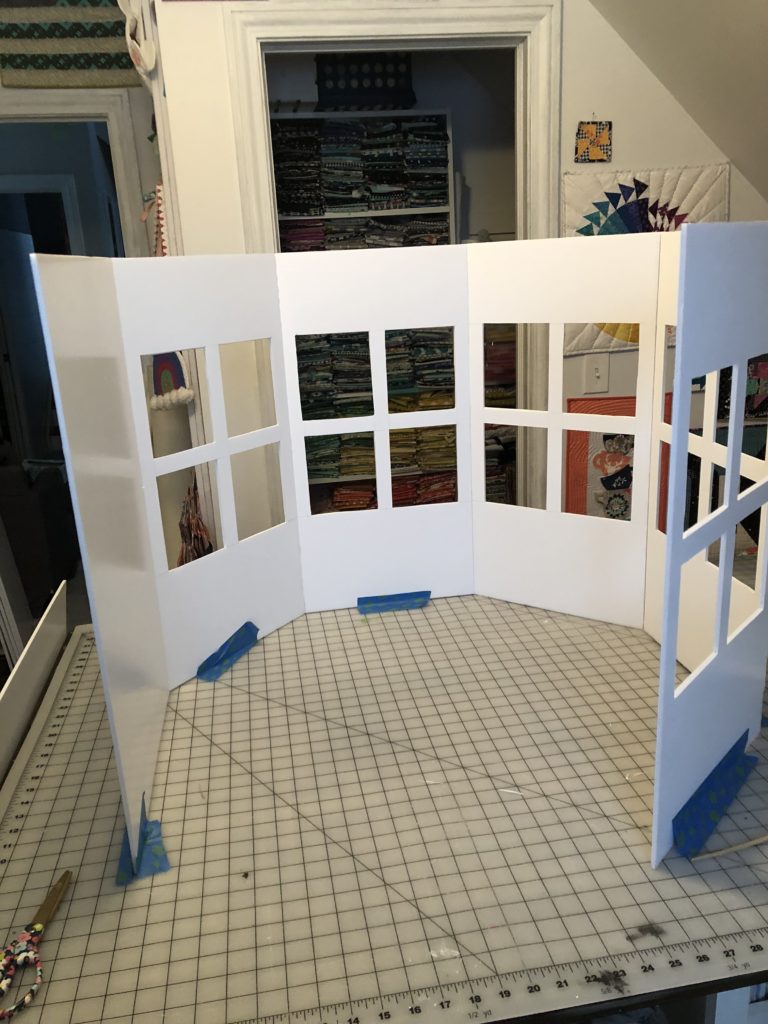
Once the walls were glued I taped it to my cutting table to get a size and shape on the grid to cut out the floor foam board piece. Once the floor was cut to size I attached it inside the walls with glue and used painters tape to hold it in place, of which you can see in the exterior photo is still there. ; ) But it will get covered.
I ended up cutting each wall at roughly 12.5″ wide x 24″ tall, and the longer wall without a window at 15″ wide. The full room measures about 28″ deep x 30″ wide. It’s pretty big.
Okay onto the roof. The was the trickiest part. I am sure there is a scientific method to figuring out the exact size and angle to cut the wedges but I used the trial and error method. I cut two wedges to about the size I thought and trimmed until I had the proper shape and then cut out the rest. I decoupaged the ceiling before gluing it all together so the seams where a little cleaner. I ended up covering the seams with masking tape “beams” anyway. But I had a friend tell me it looks just like the ceiling of her turret attic so that makes me feel good.
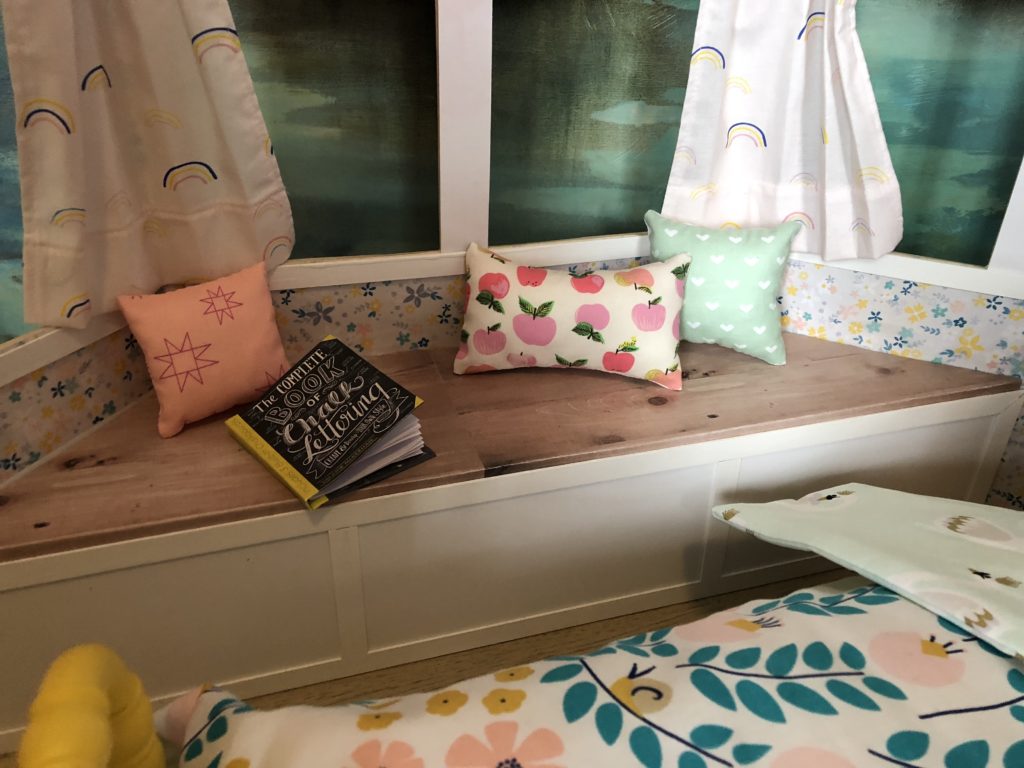
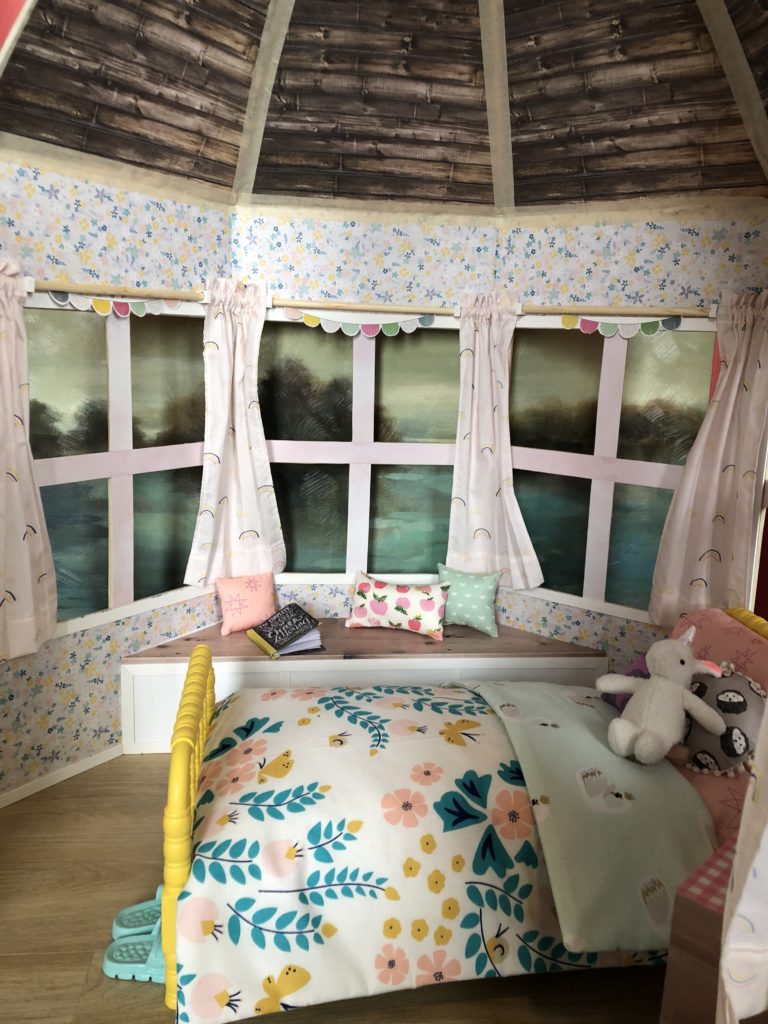
I made a Window Seat from 1/2″ thick foam core. If only it opened for storage. Ha ha. I decoupaged wood grain paper for the seat part, and used hobby wood, similar to balsa, to add some moldings to the front of the seat. Blaire and probably a friend can sit and read a book or plan a party on the bench.
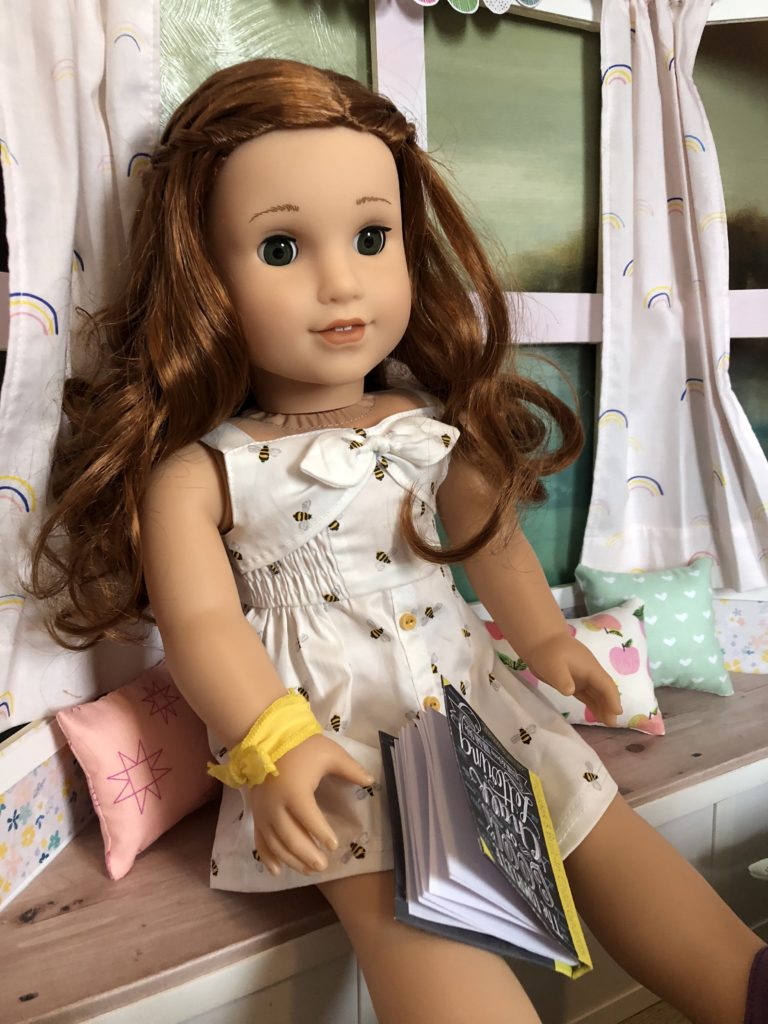
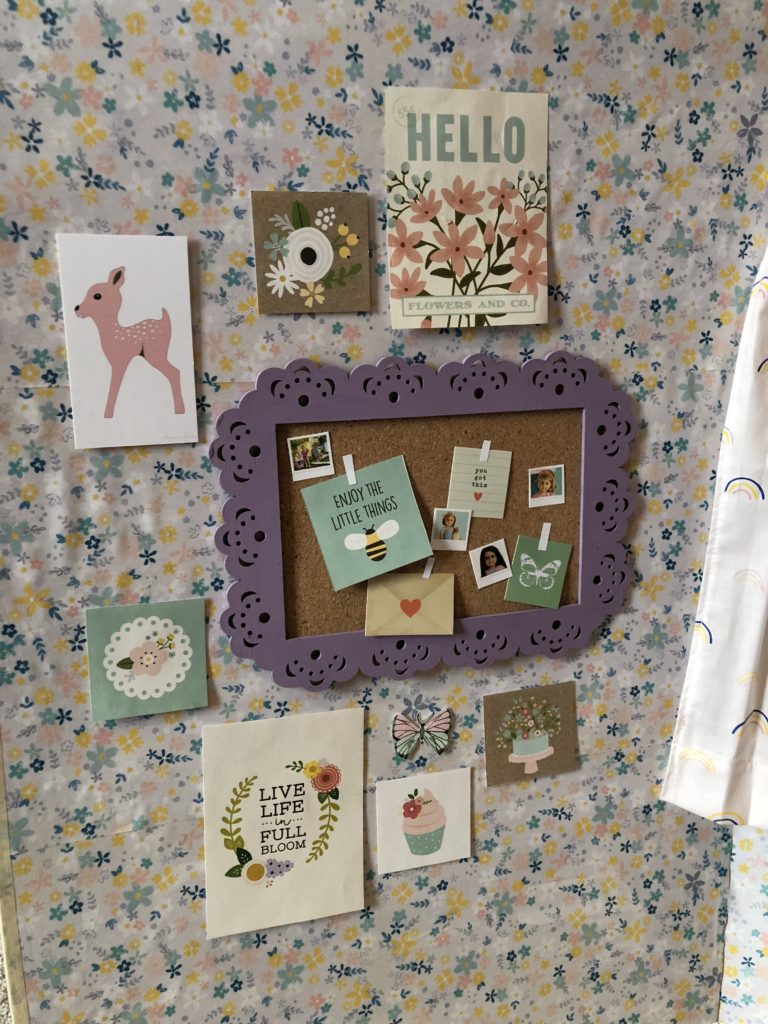
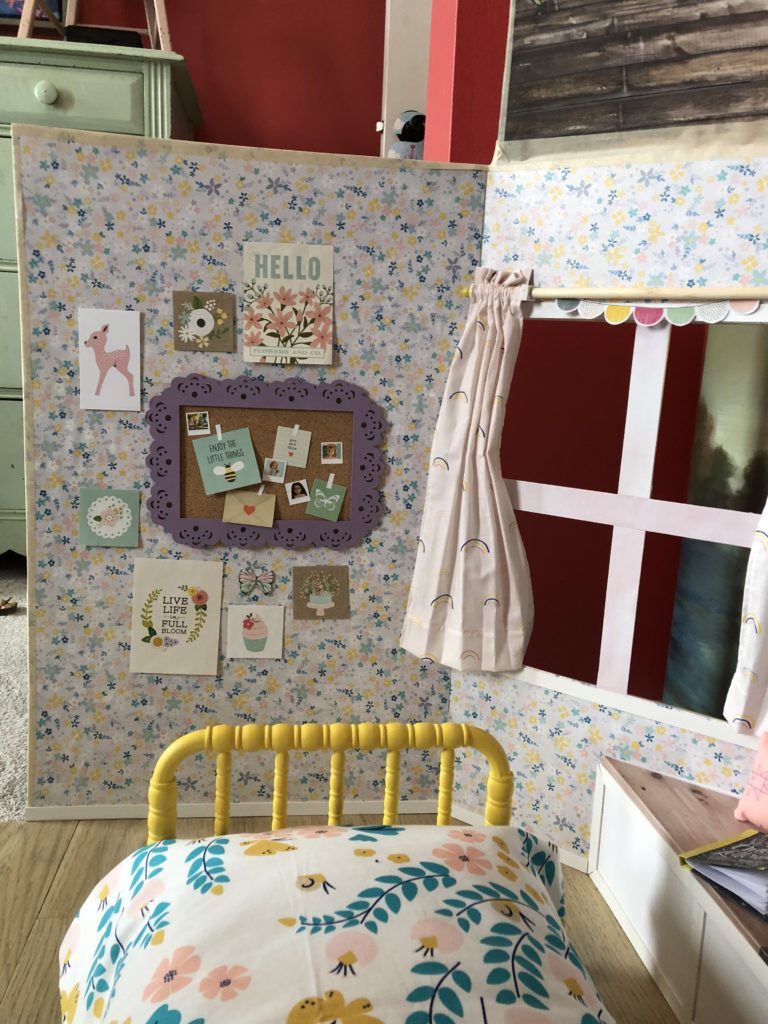
I found the cutest paper from Maggies Holmes Bloom line that both my daughter and I loved, I bought some pieces but couldn’t find enough anywhere to buy, which final lead me down the path of digital scrapbooking supplies. So cool. I was able to buy the digital file for the paper and print it on my printer. The color and scale is slightly different than the paper due to altering the file a bit in photoshop to print on bigger paper. But it’s still super close to the original paper, slightly smaller print, and more grey coloring probably due to my printer settings. I decoupaged all the walls with this paper.
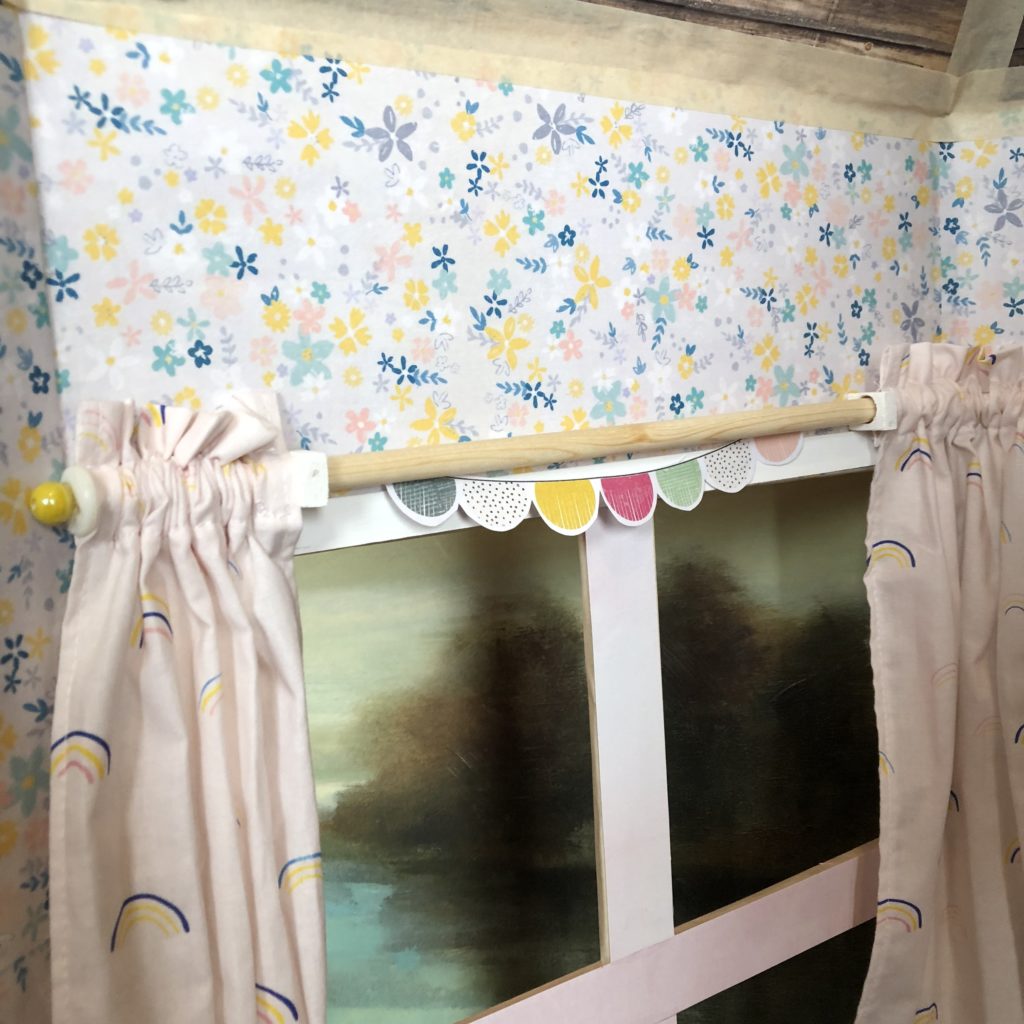
I used a different scrapbook paper from the same line to decoupage window mullions, and then used hobby wood, similar to balsa, to make actual window frames and baseboards. The floor is actual vinyl plank flooring that looks so much like real wood. It’s from Lowe’s as is very inexpensive and easy to install. I would use it again in a heartbeat and probably will when we build the big dollhouse.
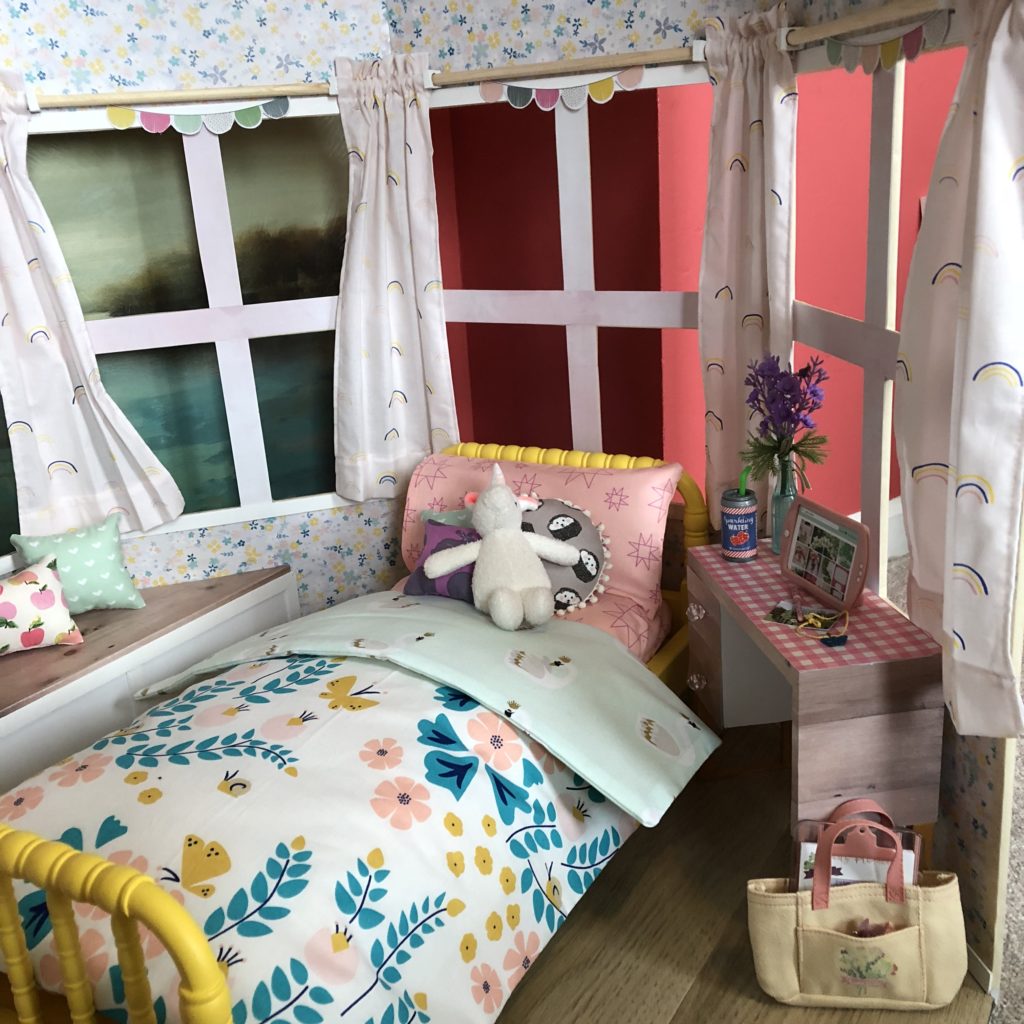
Once all the “building” was done I was able to get more into the decorating. My daughter helped select all the fabrics from curtains, bedding, and pillows. I really tried to just direct her towards a selection that would all work well and let her decide on final choices. Boy was that hard! She did a good job picking stuff if I do say so myself.
I made simple little rod pocket curtain panels and used dowel rods for the curtain rods. I cut small rectangles from square wood and drilled holes big enough for the dowel to slide through. I ended up gluing them to the wall since it’s foam core. I would definitely have used screw cup hooks or eyelets if the walls were wood. My daughter requested the little garlands be cut from scrapbook paper and hung on each window. So cute.
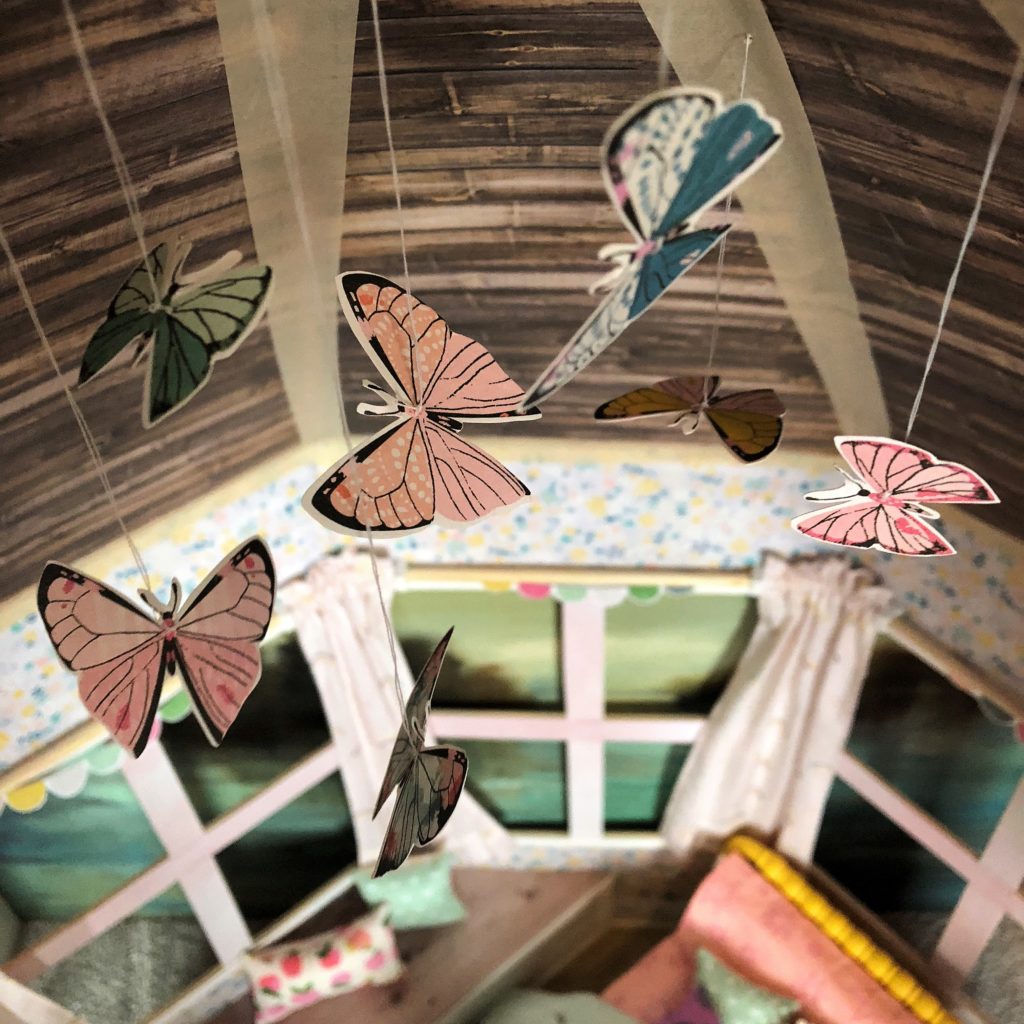
I found adorable butterfly scrapbook paper and thought if we could make the ceiling vaulted I would string the butterflies from the ceiling. I cut out two of each butterfly and glued them together so they look the same on each side. I used a long needle and regular sewing thread and strung them through the ceiling seams. It was super easy to do and makes a big impact.
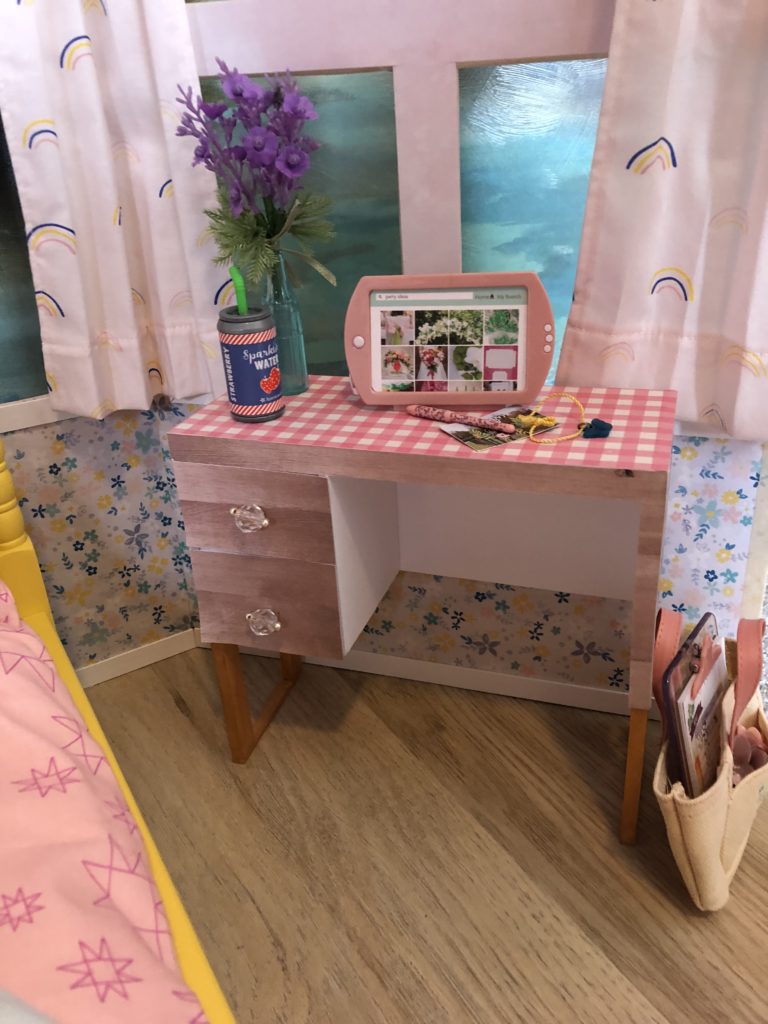
We couldn’t find a desk my daughter liked so I made one from foam core based on a picture of a real desk we found. The drawers even work. LOL. I don’t imagine this will last long. It doesn’t have a lot of weight to it so the drawers are hard to open. I’m also not sure how long the decoupaged paper will hang on for since it’s on foam core. It’s all kind of an experiment. But Blaire needs a workspace right? I used some beads and gold wire I found in my bead stash and strung some little handles. The legs are made from hobby wood and painted gold. I do think I could make this out of wood now that I have made a foam core prototype. Once it warms up and I can stand to spend more than a couple minutes in our unheated garage, where my saws are, I will try it out. Hopefully at that point I will be better at documenting the process and can make a tutorial for it.
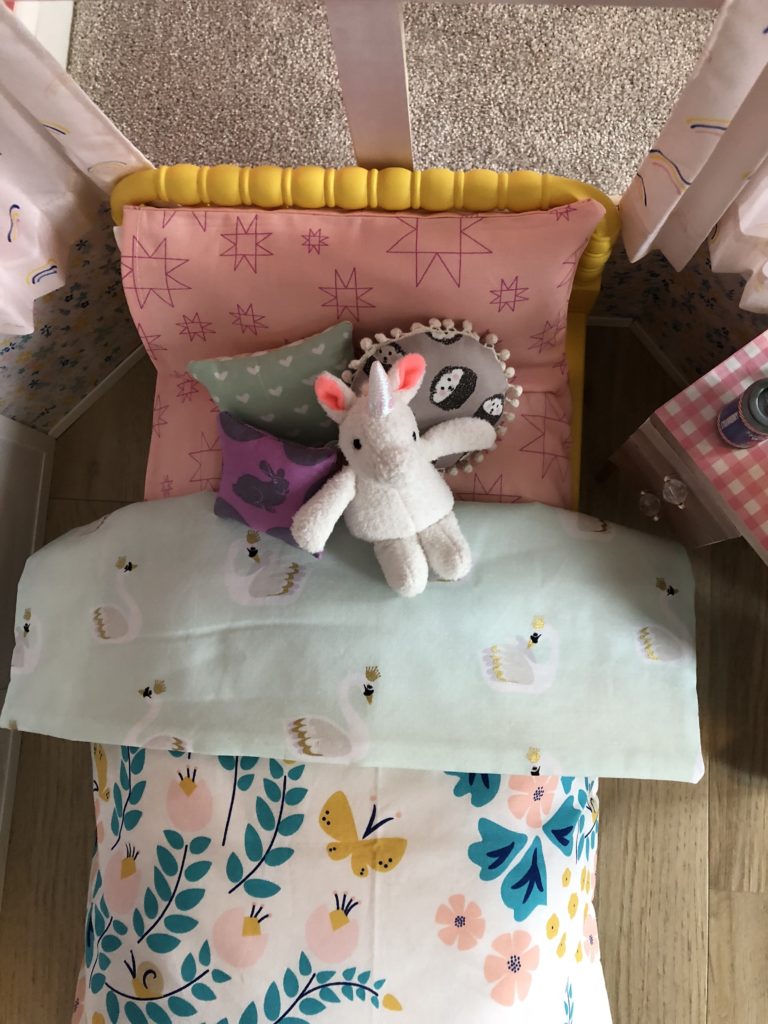
For a Bed I scored Ebay and Tutorials on Pinterest but ultimately I settled on the American Girl Bed for Molly. It wasn’t her original bed but a special release bed available the last year she was available. I found it on Ebay from a wonderful seller and was pleasantly surprised when it arrived in it’s original box in even better condition than described. I made new bedding for it, storing the old in the event we need it in the future. I made a fitted sheet for the existing mattress, a matching pillow case for the existing pillow, a reversible comforter, and a handful of pillows of which my daughter dictated fabric and shape for each.

Well that may be it! Whew.
I do have to say I would like to make from wood. Yikes! But we will see how well this holds up. My daughter although only 5.5 yrs is very good at playing with her dolls gently and carefully. If it feels like it could get ruined by the time we make the BIG dollhouse I’ll incorporate a wood version in that. If this one is doing good I have thought on making an attached garage on the BIG dollhouse and could set this on top of the garage so it’s “attached” to the house. The main reason I didn’t use wood to start is I was sure of cutting all the angles to construct it. Plus, cold garage, time, cost, lol all those factored in. This was supposed to be another “quick” project like the Snow Chalet. Oh well.
My daughter is a huge fan, and I had a blast making it. Designing in this small scale is infinitely quicker and easier than designing in real life.
Check out a little tour video my daughter did of the room down below or on my Youtube Channel. It’s the first video ever over there. Yikes! Lots of Learning to do on that front, like turn the camera sideways. ;)
Thanks so much for stopping by! Please let me know if you need any info I may have not covered.

What a perfect room for Blaire!
Nonna,
Thank you so much for your sweet comment!
This is so cute and so well done! I was thinking of doing the same thing, only in miniature size for our custom mini Blaire. Do you mind if I copy your design?