Penguin Pillow Pattern Release

It’s the Penguin Pillow Pattern Release day! I have shared these cutie Penguin Pillows for a few years now and always get asked for the pattern. So today is the day! Stop by Etsy to purchase the pattern.

Supplies and Where to Find them.

The Penguin Pillow is a super easy pattern to sew and you probably have everything you need to sew it! If not, here are some links, not affiliated, to a few places I love to buy supplies. Specifically the supplies for the Penguin Pillow.

Quilting Cotton: Shops like Sewtopia, Hawthorne Supply Co, and Nova Quilt Shop, are great for Quilting Cotton.

Felt: Wool or wool blend felt is what I would recommend as it is washable and ironable. I love to shop at Benzie for wool blend felt.

Iron on Glitter or Glitter felt: I used iron on glitter from Benzie for the eyes on my Penguin, but I can no longer find it for sale at Benzie. Benzie does have glitter felt that would work great though. If you want to try the heat transfer vinyl glitter, this looks like it would work from amazon.

Stuffing: You’ve got to try Cluster Stuff stuffing it’s such a great stuffing and all I can use if I can find it. I think it is pretty much exclusive to Hobby Lobby. It is definitely the superior stuffing if you ask me.

Tags: Want to up your game with tags? I get mine printed at Miss Label on Etsy. I have purchased several times from them and love the labels for stuffies, pillows, pouches, and bags. Other fun labels or tags like these from Sarah hearts or a fun patch would be very cute too.

Making a Penguin Pillow in a different size.

The Penguin Pillow is the perfect size for a small little companion pillow. It measures 11″ tall x 7″ wide. You can see the scale in the first picture from this post.

That said I included a Bonus Giant Penguin Pillow Pattern file when you purchase the Pattern to make a Giant 18″ tall x 15″ wide Penguin Pillow. So basically double the size of the original. It’s BIG.

For a perfect mini penguin that you can add a hanging ribbon to and make an ornament, or make it and use for an 18″ doll pillow like I have. Just print the original(not giant) pattern pieces at 50% for the scale. The seam allowance will shrink a bit but there is plenty of room to not have to worry about that.

To make the Giant Bonus Penguin Pillow or any reduced in size Penguin Pillow you will cut out and sew just like the instructions say to. There is plenty of space on the pattern not to have to worry about seam allowances as you shrink the pattern.

What I made!

Of course I made a few Penguin Pillows. I started with the main guy all with felt. Then I ended up making the same original size with quilting cotton swapped for the felt.

I couldn’t stop there and started reducing and increasing the size of the pattern. Which got me to the little guy that works so well for 18″ dolls, I have made a bunch for doll Quilt/bedding sets. Increasing the size got me one that was slightly larger but it was tricky to increase a pattern just with copying it since the patterns pieces all a whole page already. I had to copy larger, flip, copy larger again, and repeat then tape everything together.

Which led me to just making the Giant Bonus size file or pattern pieces that is even bigger than my original increase. The theory is that you can print this Giant at a bunch of smaller scales by reducing the % it prints at. So make a waddle (what a group of penguins on land is called) of different Penguin sizes. Or and just incase your where curious a group of penguins in water is called a raft, different than the land waddle. LOL.

Tips for sewing

Sewing small pieces that are curved can take a bit of practice. I would suggest to pin the heck out of them so they don’t shift and go slow. I often will stop around the curve with my needle down and lift the foot up to shift the fabric underneath. This works well once you get use to it on the very tight curves.

Using a fabric other that quilting cotton for the body? I used a minty like fabric for the body of one and it was tricky! A little bit slippery so top stitching other fabrics on top had some shifting. I would recommend , again, lots of pins. Also a walking foot would be helpful.

The last tip is if you are sewing batting in between the quilting cotton feet you will need to layer the quilting cotton right sides together and then lay the piece of batting on top of, or underneath, both. That way when you turn the feet right side out the batting will be on the inside. Think in terms of the two fabric right sides together touching each other are the exterior pieces anything else layered on top will be on the inside. Don’t forget to cut the extra 1/4″ around the sides and bottom of the feet and tail, but no the top edge. That way they will end up the same size as if cutting from felt.

Ideas

Wouldn’t a Rainbow of Penguin Pillows be so much fun to make? As usual I have so many ideas of how I could sew up one of my patterns but not enough time. I hope you will try out some fun colors or different fabrics and share with me.

Email me here, message me on Etsy, or share on social media with the hashtag #woollypetalspenguinpillow and tagging me @woollypetals .

Next up for me is to make it using Shannon Cuddle or Minky Fabric for my daughter. She is not a fan of the feel of quilting cotton. What?? So I always try to make things for her from a softer fabric. Flannel would work great too. See?? so many ideas!

Penguin Pillow Pattern HERE.

P.S. Pair it with my Penguin Social Quilt for the Perfect Present.

Thanks so much for stopping by!

12 days of Christmas Giveaways

From December 1st – December 12th two friends, Mollie of Wild Olive, and Stephanie of Stephanie Thomas Handmade and I are hosting a 12 days of Christmas Giveaways over on Instagram. Come check it out on Instagram. All the fun Giveaways are still going and more are coming each day! I will share some of the things we have been sharing here and update at the end so you can find all the Free patters, tutorials, and links in one spot.

Day 1 was the Wash You Paws update. Check that out here. I updated this free Pattern to included a Charm pack version. Stephanie is hosting a Tula Pink Hushaby Charm Pack giveaway through December 1st on Instagram

Day 2 was the Patchwork Tote. I am giving away a Woollypetals Patchwork Tote made from all Christmas fabrics as well as an FPP To the Stars Pattern Pack + another pattern of winners choice. Giveaway is on Instagram through December 8th.

Day 3 was the See Through Project Bag tutorial. I made a See Through Project Bag with a cute FPP Turtle block by Unicorn Harts and am giving it away stuffed with scraps from Stephanie. Check out Stephanie’s Instagram for that giveaway through December 8th.

Day 4 Stephanie is sharing an Enchanted forest Quilt she made and giving it away! What! Check that out on Instagram.

Day 5 Mollie of Wild Olive made this adorable Free Tree ornament inspired by our Collaborative Enchanted Forest Tree Quilt Pattern. Go Check out the Free Tutorial on her website HERE. Mollie is also giving away a her Cozy Quilt Ornament pattern on Instagram.

Day 6 Woollypetals released the new Penguin Pillow PDF with a short 1 day giveaway of a Penguin Pillow Pattern and Penguin Social Quilt pattern. Check out both, and if it’s December 6th hop over to Instagram to enter the giveaway.

I will update every few days so you can find everything together. Giveaways are good for about 1 week after posting and then winners will be picked. There is still plenty of time to join in the fun. Hop over to Instagram to @woollypetals, @molliejohanson, and @stephkthomas for all the fun.

Thanks for stopping by!

Wash Your Paws Quilt Pattern Update

Let’s get into the Wash Your Paws Quilt Pattern Update. The Wash Your Paws Quilt Pattern was released as a free pattern in March of 2020. Was your Paws seemed like a fitting name based on the times we were living in in the spring of 2020.

The original below is 63″ square and uses 6.5″ squares. This pattern can be made scrappy or more color blocked. It has so many fun options.

Wash Your Paws Quilt FREE PATTERN

In December of 2021 I decided to make a Christmas version and made it bigger adding an extra border and switching the background to patchwork as well. I added a page to the pattern then to share how to sew this version up.

in spring of 2022 I made a version using a Charm Pack, 5″ squares that finish at 4.5″. I increased the background sizes to make the quilt a 60″ square and a decent size. I am finally getting around to adding that version to the pattern.

Details

So now with the Wash Your Paws Quilt Pattern Update you can download the PDF that has the original version and the bonus pages for the the two bonus versions. I also share that you can omit the background borders in the Charm pack version and make a nice 38″ square baby quilt.

This is a FREE pattern that will remain free forever. I did change the way it is downloaded though So I can fingers crossed see how many people are downloading. I just think that’s fun!

But it’s my way of saying thank you for being here. As well as giving an introduction to my pattern writing style.

I hope you will make it, or make it again and share it with me. Email me, or use the hashtag #washyourpawsquilt on social media so I can see it.

DOWNLOAD THE FREE WASH YOUR PAWS PATTERN HERE.

Thanks so much for stopping by!

Enchanted Forest Quilt Pattern Release

The Enchanted Forest Quilt Pattern Release is here! Check out all the details below, including info for the Companion Embroidery Pattern designed by Mollie or Wild Olive.

Link to woollypetals Enchanted Forest Quilt Pattern.

Link to Wild Olive Enchanted Forest Companion Embroidery Pattern.

The Enchanted Forest Quilt Pattern is a fully customizable Tree Pattern. You can make the Cover Quilt as shown. Or mix and match 8 different tree styles and 2 background options to make your own beautiful Enchanted Forest. The snowman block can be swapped for any tree to add more snowmen, or have no snowmen. 

The 8 different types of trees are a Single Fabric Tree, a Snowcapped Tree, a Tree with Eyes, and a Patchwork Tree. Each Tree style has both a Tall Tree and a Short Tree to mix and match. All blocks are the same size though so you can easily mix and match any tree or the Snowman Block.

The Pattern has an included FPP Star to use in the patchwork background and 2 cute little traditionally pieced Mushrooms! These Stars or mushrooms can be subbed in for any whole Background square.

The whole quilt aside from the FPP Star, FPP Mouth, and FPP Snowcaps is Traditionally pieced. And those FPP options are all optional. LOL. The pattern walks you through making all the different styles of trees as well as the patchwork background shown above and a single fabric background.

The Snowman Block is very tiny piecing and can be a little tricky due to that. I share some tips and tricks in the companion video for the snowman.

The companion video has tips and tricks for all parts of the quilt to walk you through some things that you may have never done before.

The Enchanted Forest Quilt Pattern does require you to print Templates to cut out or trim background and Tree Sections. The Templates are in a separate file as the Sewing instructions to allow ease of printing if you like to view your PDF patterns on your device.

Wild Olive Companion Embroidery Pattern

My friend Mollie of Wild Olive design Embroidery and Cross Stitch patterns. Mollie made an adorable companion pattern for the Enchanted Forest Quilt that includes a lot of embroidery garlands, ornaments, snowflakes, and presents.

Mollie also includes a stitch guide with her pattern and has lots of embroidery info on her website.

This companion pattern is such a fun addition to try your hand at a new skill and add another layer of cuteness to the Enchanted Forest Quilt.

More Layouts:

Here are a few more layout options and inspiration Enchanted Forest Quilts for you.

I hope you are as excited about the Enchanted Forest Quilt Pattern Release as I am. It is a super fun pattern and I can’t wait to see what you make.

Let’s Sew Together:

Go grab your pattern today in the Woollypetals Etsy Shop or the Wild Olive Shop.

For a limited time we have a discounted Bundle of both the Enchanted Forest Quilt Pattern and the Companion Embroidery Pattern together. Get the Bundle Here.

Also stop over to Instagram and see more examples from The Enchanted Forest Quilt Pattern Testers on the hashtag #enchantedforestquilt as well as many examples on Mollie and my Instagram pages.

Thanks for stopping by!

Ghost Party Quilt Video List

The Ghost Party Quilt Video List is for anyone interested in extra help with the Ghost Party Quilt Pattern by woollypetals.

You can access all of the videos from the 2023 Ghost Party Sew A Long on the woollypetals Youtube Channel.

Ghost party Video List

Week 1 – Cutting Tips

Kristin walks you through how she cuts out lots of squares. Specifically using a stripology ruler.

Week 2 – FPP Stars, Eyes, Mouth

Kristin shares how to Foundation paper piece the Ghost Party Stars, Eyes, and Mouth.

Week 2 – Web Piecing

How to web piece a whole quilt block for faster more efficient sewing.

Week 2 – Traditional Pieced Eyes, Points, and HST

Kristin shares how to Traditionally piece the Ghost Party Eyes, Points, and HSTs.

Week 3 – Mouths: Traditional Pieced, FPP, and Embroidery

All the mouths for the Ghost Party. Traditional, Fpp, and Embroidery are shown in this tutorial.

Week 4 – No new videos

Week 5 – Quilt Top Assembly

Assembling your whole quilt top is exciting, but can also be daunting for new sewists. Here’s a tutorial on how Kristin sews a Ghost Party Quilt top up.

Week 6 – Tabletop Basting

If you hate bending over and scooting around on the floor tabletop basting might be for you. Kristin shares this tutorial of how she tabletop bastes.

Week 6 – Free Motion Quilting

If you would like to try free motion quilting on a domestic machine this might be a good starting tutorial with Kristin to try.

Week 6 – Binding

Cutting, sewing, ironing, sewing, machine or hand stitching to finish. It’s all here to sew your binding on your Ghost party Quilt, or any quilt for that matter.

You can click over to my Channel and access them all or just go to the one you are needing help with the most.

Join my newsletter for notifications on new Sew A longs as well as pattern releases and the occasional sale. You can join to the right on the sidebar of this website.

Thanks for stopping by!

Squirrel!!! Quilt Pattern Release

It’s October 1st and that means it’s Squirrel!!! Quilt Pattern Release day! Yay! Buy Here.

The Squirrel!!! Quilt is a very cute LARGE squirrel sewn up of smaller squares on a background sewn up of larger squares, at least that’s the gist of it. :) 9 years in the making, from a first rendition of a “Dead” squirrel for my sister in law who’s nickname was squirrel at the time. p.s. I didn’t intend for it to look dead. But she loved it none the same.

Fast forward a few more years and I made another squirrel quilt making the proportions a little better, fixing the arm, adding a real eye, etc.. It was a great version. About this time people starting asking if it would be a pattern and I knew it would be a fun one but I also knew I couldn’t easily write it as a pattern with some of the odd angles I sewed in the second version.

Which lands us in 2023 when I resurrected the pattern again and made it out if Sugar Maple by Ruby Star Society. I changed the configuration yet again to adjust the proportions and make it sewable in a relatively easy manner by making it mostly squares and pieced Quads.

I think It landed in the cutest possible place. The proportions are right and it’s a perfect scrappy patchwork style so it’s easily sewable and as cute as can be.

Pattern Details

The Squirrel Pattern is in my Etsy shop as a 20 page PDF digital download pattern. It has a private video linked in the pattern to explain on the more involved planning and cutting parts of the pattern. The sewing itself is very simple all straight line sewing, traditionally pieced. The cutting and planning are explained as best I can in the pattern. The video expands a lot on all the parts that could use a little more explaining.

The pattern uses Fat quarters and Fat Eighths and can be made as simple or as scrappy as possible. I am sharing the Fabric requirements below. But I highly recommend to make this pattern very personal with your fabrics.

The pattern has two pages with cut lists for all the different fabrics. It shares step by step instructions with diagrams in full color. And it comes with a bonus acorn block pattern with cut list and written instructions. It comes with a link to a private Youtube video instruction for the acorn since there are no diagrams in that one page pattern.

Mock Ups

Let’s take a look at some fun mock ups I made to see this quilt in lots of different fabric.

You can see in the top left mock up I used the acorn block and replaced some of the background blocks with them.

On the bottom left I swapped in a few stars from my To the Stars FPP pattern pack, available on Etsy. This pattern has stars in squares that work with the size squares in the Squirrel!!! Quilt pattern.

The bottom middle I based on a picture of a squirrel a tester shared and scattered the reds from the stomach and tail onto the top of the head.

In a hilarious turn of event one day while stitching with friends we mocked up some Harry Potter squirrels. One in each of the house colors. I’m a fan and really kinda need to make them.

I really hope you love this trip a little bit down memory lane over my new Squirrel!!! Quilt Pattern Release and hope you will make a fun squirrel quilt for you or someone that loves squirrels.

The Squirrel!! Quilt Pattern is in the woollypetals Etsy shop to purchase!

Thanks so much for stopping by!

Ghost Party Sew A Long Prizes

Let’s talk prizes!

We have rounded up a bunch of fun prizes and discounts for the Ghost Party Sew A Long 2023.

Ghost Party Sew A Long Prizes from Ruby Star Society, Poppie Cotton, Windham Fabrics, and our hosts Woollypetals and Cool People Quilts.

I’m not going to tell you which week is which prize but I will share the bundles here. Below each image I write out exactly what the prize is for that week. Again these are not in order so you can be surprised each week when we announce the giveaway.

Windham Fabric donated this 22 fat quarter bundle of Hot house by Deborah Fisher. Cool People Quilt donated a PDF Copy of their Cool People Quilt pattern. Woollypetals donated a PDF Pattern of winners choice from their Etsy shop.

Poppie Cotton donated this 21 Fat Quarter Bundle of Kitty Loves Candy. Cool People Quilt donated this cool merch tote bag. Woollypetals donated a PDF Pattern of the winners choice from their Etsy shop.

Windhand Fabrics donated this 24 Fat Quarter Bundle of Pen + Ink by Whistler Studios. Cool People Quilt donated this sticker, magnet, pin pack. Woollypetals donated a PDF Pattern of the winners choice from their Etsy shop.

Windham Fabrics donated this 17 Fat Quarter bundle of Frolic by Whistler Studios. Cool People Quilt donated this merch t shirt. Woollypetals donated a PDF Pattern of the winners choice from their Etsy shop.

Woollypetals donated this 31 Fat Quarter Ruby Star Society Tiny Frights Bundle and PDF Pattern of the winners choice from their Etsy shop. Cool People Quilt donated this merch t shirt.

Windham Fabrics donated this 20 Fat Quarter Bundle of Sweet Abigail by Tessie Fay. Cool People Quilt donated this merch water bottle. Woollypetals donated a PDF Pattern of the winners choice from their Etsy shop.

Ruby Star Society Donated 3 bundles of 8-9 Fat Quarters of Tiny Frights along with some RSS Stickers. Woollypetals donated a Pdf Pattern of Choice to the winner. These bundles will be randomly added as a second giveaway to 3 weeks during the Sew A Long. So there will be a winner of a big bundle those weeks and second winner of one of these.

The Grand Prize Bundle: This bundle is for anyone that participated all 6 weeks of the Ghost Party Quilt Sew A Long. Those Participants will automatically be entered to win this amazing bundle.

Cool People Quilt donated this 41 Fat Quarter bundle of all OG C+S fat quarters. Longarm Lins of Cool People Quilts donated long arming for the winners Ghost Party Quilt. Woollypetals Donated a PDF Prize Bundle of 5 patterns of the winners choice from the Woollypetals etsy shop.

Another Sponsor I want to Shout Out is Knot + Thread Design. Kaitlyn is offering 20% all Ghost Party Sew A Long participants Ghost Party Quilts through the end of 2023. Details will be in your welcome email on Augusts 27th.

Let’s give all out Sponsors and Hosts a Hand for all the fun prizes, discounts, and hardwork put into this Ghost Party Quilt Sew A Long.

I hope you will join us for this super amazing Ghost Party Quilt Sew A Long. It’s going to be such a fun time. Sign ups are closed. Sign ups close at end of day August 26th, and remember the only way to be able to win any of these prizes is to be on the sign up list and participate on Instagram.

Thanks for stopping by!

Ghost Party Sew A Long 2023

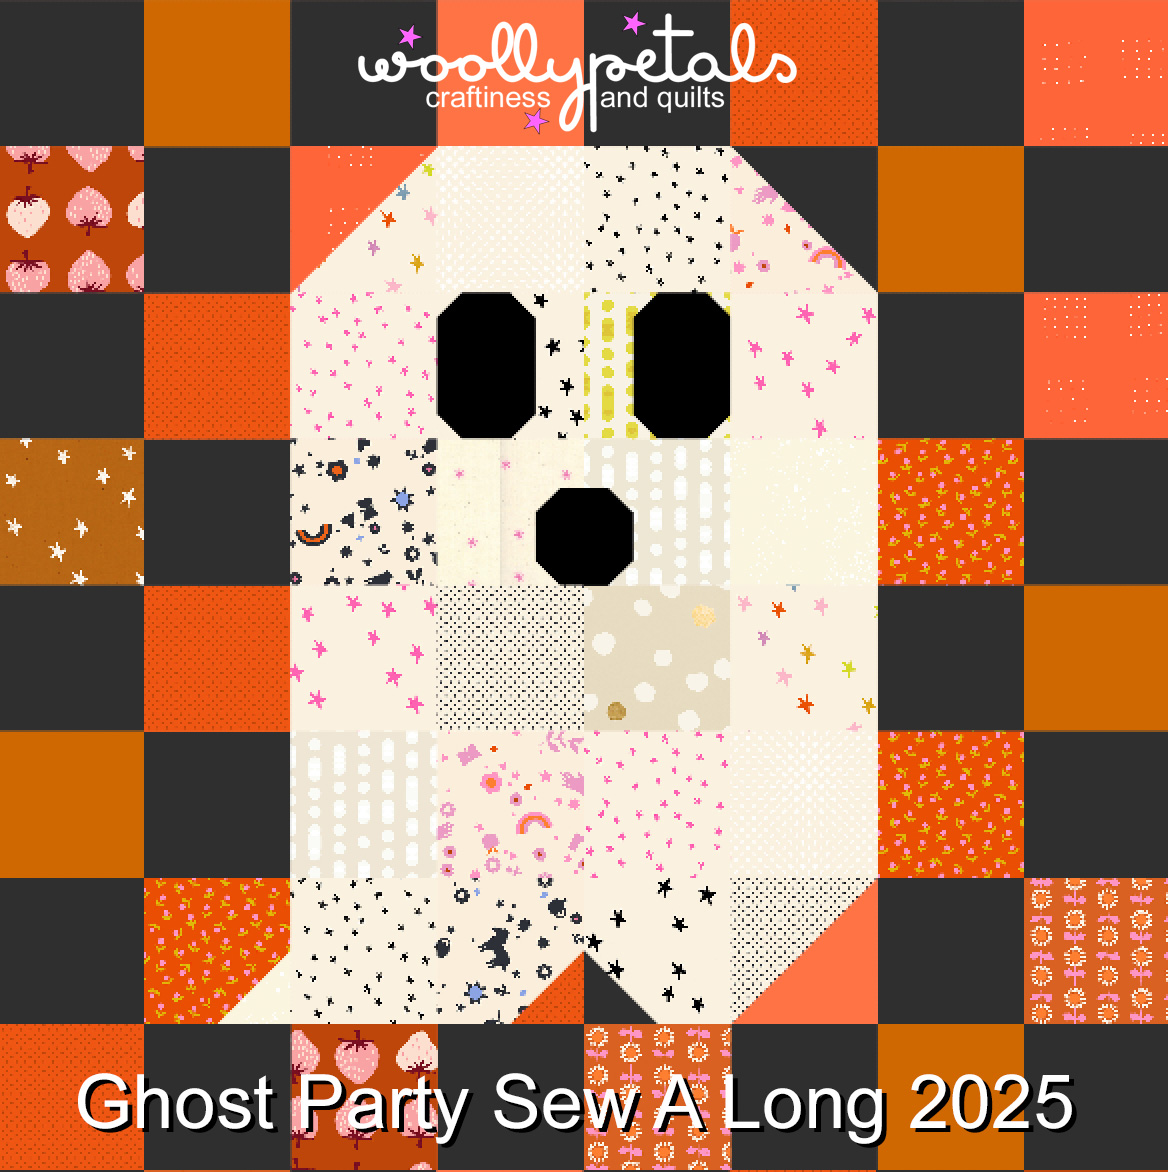
Woollypetals and Cool People Quilts are hosting a Ghost Party Quilt Sew A Long this Fall.

The Ghost Party Quilt Sew A Long sign ups are open from August 16th – August 26th. Sign up Closed.

Sew A Long Details

The Ghost Party Quilt Sew A Long will run from September 1st – October 15th.

Each week there will be prompts via an email and on Instagram for what you need to accomplish during that week to make a Ghost Party Quilt within the Sew A Long timeline.

Our Schedule is as follows:

Week 1 – Fabric Selection and Cutting

Week 2 – Sew BOOne

Week 3 – Sew jACCK

Week 4 – Sew AHHna

Week 5 – Assemble Top

Week 6 – Quilt and Bind / Catch up to finish top.

This will be a nice pace to not be overwhelmed but also quick enough to help you have a finished quilt by Halloween depending on if you quilt it yourself or send it out to a long armer.

How to Join in

The Sew A Long is free to join but you will have to purchase the Ghost Party Quilt pattern in woollypetals Etsy Shop. Sign ups Closed.

To join in the Ghost Party Quilt Sew A Long you need to follow both Cool People Quilts and Woollypetals on Instagram so you won’t miss anything you need to do. You also need to sign up for the email list here so you are eligible for prizes. You can of course Sew A Long without signing up but you will not be able to win any of the prizes.

Each week we will share what the prize is and you will need to post something related to that weeks prompt on Instagram and also comment on the Weekly post to share that you posted. We will pick a winner at the end of each week to be shipped a prize.

We will also have a grand prize at the end for one lucky person who posted all 6 weeks in the Sew A Long.

We have some awesome prizes of fabric bundles donated by Windham Fabrics, Ruby Star Society, Poppie Cotton, and Cool People Quilts along with Cool People Quilts merch for each week.

Once you sign up for the Ghost Party Quilt Sew A Long you will receive a discount code for Cool People Quilt Fabric Shop as well as a discount for Woollypetals Etsy shop that will be good for the Ghost Party Quilt Pattern.

Be Inspired

Not sure you want to join in? Really there is no loss for signing up. Worse case you don’t join in at all. And there’s no harm in that. Best case you have a super cute Ghost Party Quilt to snuggle under for Halloween.

But trust me. There is literally no negative to signing up. Go Check out the #GhostPartyQuilt and #Ghostpartyquiltsal hashtags on Instagram and check out all the fun versions people have made.

Start Fabric Shopping

Want to start planning fabrics? Check out this blog post full of Ghost party Mock ups. I shared the Yardage Requirements below as well to get you started.

Cool people Quilts is selling cute Ghost Party Kits (see image below) based off the book “The Little Ghost who was a Quilt”. You can preorder those at the links below.

Cool People Quilts Ghost Party Kit with Backing

Cool People Quilts Ghost Party Kit

Cool People Quilts The Little Ghost who was a quilt Book

Woollypetals will also be selling quilt kits of her Ghost in a Garden version (see a block of last years version below). Keep an eye out for those on here Instagram page.

Woollypetals Instagram Page

See You at the Sew A Long

I hope you will choose to join us in the Ghost Party Quilt Sew A Long fun on Instagram and in your inbox. Sign ups closed and then go get your fabric and pattern.

Thanks for stopping by!

Woollypetals Mini Quilt Swap Extras Guide

I decided to make this Woollypetals Mini Quilt Swap Extras Guide to help you know what to add to your swap package. This guide is for the Woollypetals Mini Quilt Swap 2023 but if you come across it for another swap I hope it can help you too.

Wow! That’s a lot of stuff. I wanted to show you a vast array of fun things that work in a swap package. In general I think swaps suggest 1-4 things added to the package as extras. Most say to not go crazy or send anything expensive. What works best is things you may have extras of. Something small that you use over and over again and love. A fun little kit or sticker.

Let’s break down what’s in the photo above.

3.5″ bloc loc / Cindy’s seam ripper / aurifil 12 wt. thread for embroidery or hand quilting / a needle grabber / pig pouch (pattern by woollypetals) and any pouch would do / a Quilty perler bead creations (get your kids involved) / smiley face sticker (Quilty sticker linked) / thread pin (similar linked) / stitch supply binding spool / hexagon flower / artwork / felt Butterly magnet kit / charm pack / heart garland (similar linked) / fat quarters.

I linked what I could in that picture. But some of the above are just things I have picked up here and there, created, or are not linkable. None of these links are affiliated. I just like spreading the love.

What to actually send

Below are several groupings of some of the stuff shared above. Broken down into a smaller group of what might be included in one package.

Keep the person you are sending to in mind. This little grouping could get sent off to someone that likes hand work. Maybe you noticed your recipient uses and makes Hexagon flowers a lot for quilt or to sew on projects. The little finger seam ripper is a fun easy tool to have close by for hand work too.

Maybe you noticed your recipient loves to sew quilts with HST’s of a certain size so a bloc loc ruler would be a great asset to them. Or they love pigs and to hand stitch so you make them a pig pouch ;) Some hand quilting thread is a fun addition to a package when someone likes to hand quilt a lot.

Sometimes it’s very apparent someone loves a certain animal, drink, or style. Which allows you to play with that obsession… ;) For example this group of extras could be for someone that loves squirrels, with cute squirrel art and some fat quarters with squirrels.

Shipping it all out

The goal with extras is to just to have fun. So don’t over due it and definitely don’t stress. Some people will send a lot of stuff and that’s okay, some people might not send any, and some will send a few. I think everyone in this swap is pretty amazing so will be happy with whatever comes their way. But if it’s your first swap or your not a big gift giver, keep it simple and stick to just a couple things that any quilter would love. Or you know for sure they would like based on your recipients info and Instagram.

Remember for the Woollypetals Mini Quilt Swap 2023 the goal is to send in a padded Priority envelope or a padded 9″ x 12″ envelope for those outside the US. So once your mini is in there not much else will fit.

Padded is best as it has a little extra protection from the outside world. Often it has some sort of plastic liner or the whole envelope is plastic which helps protect against the elements.

Feel free to wrap your items or not. I do recommend putting in a plastic bag (you can reuse a target bag) and separating any food or liquid items in separate bags from the mini quilt.

Lastly DON’T forget a card with your name, Instagram name, email. Any way you want your recipient to find you is good to write in that card.

A few more ideas

A few more things that could be fun extras: Please don’t forget to put any consumables or liquids in its own bag or separate from the mini quilt.

Drink gift card, tea bags, candy, sweet treat, notecards, small roll of binding, pins, thread, scissors, any small handmade item, patches, socks, pattern. There are so many options. Feel free to share what you’re sending in your stories or post on Instagram for others to see and to get input from your fellow swappers.

I hope you found a fun suggestion in this Woollypetals Mini Quilt Swap Extras Guide to add to your package.

Thanks so much for stopping by!

Woollypetals Mini Quilt Swap Labels

Let’s talk mini quilt Labels. It is really great to have a logo on your Mini Quilt for the Woollypetals Mini Quilt Swap. So I am sharing a few things to make it easy to make Woollypetals Mini Quilt Swap Labels.

What to Include on a Label

Your Name/Instgram (whichever you prefer)

The person you are making for (Name or Instagram name)

The swap name and year : Woollypetals Mini Quilt Swap 2023

Additional info like which quilt pattern you used would also be fun. The most important info being your name and the swap name/year.

The label shown below was written with a Pigma Micron Fine Point Marker. See below for a link to this marker.

Woollypetals Mini Quilt Swap Logo

I am making some files available for the Woollypetals Mini Quilt Swap Labels. There are several options. So download which file works best for you.

Here’s the First one 8.5″ x 11″, standard paper size, with 4 logos. Two logos big and two logos small. One of each size with a box around it. Also one of each size with no box. Prints without the black border around the outer edge. Download link at bottom of post.

And the other option is a 4″x6″ image with the logo as shown below. Prints without the black border.

The last is just the logo itself to print however you need.

Okay here are links to each image in my Google Drive. Download whichever ones you need to make your own label. I can’t wait to see them!

8.5″X11″ PDF File DOWNLOAD

8.5″X11″ JPG File DOWNLOAD

4″X6″ PDF File DOWNLOAD

4″X6″ JPG File DOWNLOAD

Logo Only JPG File DOWNLOAD

Check out @stephkthomas on Instagram to see the logo she made using computer printer paper and the woollypetals mini quilt swap logo.

This is the updated version of the printer paper she used. June Tailors Computer Printer Paper. I’m sure you can find it at multiple sources and also use another brand.

Another option for making a Label

Another option for making a label is to use a fabric writing pen or marker and write out your logo on a solid piece of Quilting Cotton. Just write what you would like to say and then heat set your marker with an iron. Since Mini Quilts don’t typically get washed you will have no problems with fade. But I have heard from several people they don’t have problems with this method of washed quilts as well.

Recommended Markers:

Pigma Micron Fine Point Marker

Pentel Fabric Gel Roller

Finishing your Label and Sewing it on your Mini Quilt

There are a couple ways to finish your Label. You can cut the edges with pinking shears or zig zag/serge the edges and top stitch on the back. If I am stitching the label on by machine I like to do this prior to quilting and stitch it only to the backing.

You can hand stitch it on after quilting with a whip stitch or fun embroidery thread and stitches. Just make sure to not go through the front of the mini.

Another option is to add the corners to the back for hanging and write or stitch your label onto that corner piece. See tutorial in the Star Petals Mini Quilt pattern all swappers were gifted or the pattern will be available in my etsy shop as of August 1st, 2023.

An additional way to finish your label is to have finished edges and top stitch or hand stitch it down. You can achieve finished edges by pillowcasing (personal terminology) your label and stitching it on. Pillowcasing is when you sew your label right sides together with another piece of fabric the same size around all edges, leaving an opening for turning. Once you turn your label right sides out, poke out the corners and iron to get a nice crisp square/rectangle. You can close up the turning hole when you stitch the label down. This way gives you finished sides but also is thicker with two pieces of fabric.

To achieve the finished edge without pillowcasing you can do that by turning under the edges 1/4″ with an iron and stitching it down.

I hope this as given you a some ideas and advice on how to make a label for your mini quilt or any quilt/project. You can of course use your own labels if you have some printed as well.

Thanks so much for stopping by!